 |
In honor of Eleven's upcoming regeneration, I've started marathoning Matt Smith's episodes while I bake. It's good because I've seen these episodes all before, so I don't have to pay 100% attention and can concentrate on baking but still have some entertainment on in the background. Re-watching his first episode, The Eleventh Hour, I can't understand why I didn't fall in love with him after watching this one for the first time. I should have been head over heels after this "Hello, I'm the Doctor. Basically...run" line and his bowties and suspenders. But at the time, I was still mourning Ten and that probably clouded my judgement. Makes me think that I shouldn't take Eleven's death too hard and keep an open mind about Twelve.
And that 50th year anniversary episode...that was as perfect of a Doctor Who episode that I have ever seen. My experience was probably enhanced by the fact I was watching in a full theater of Whovians, all dressed up and waving their sonic screwdrivers around. The climax of that episode (not going to say what, because spoilers!) will probably go down as one of my top TV moments.
Anyways, it's good I've got all of Eleven's episodes to watch while I bake because this week is a major baking week! Two potlucks, my regular Thursday baking, and a birthday this weekend! Luckily I got that Kitchenaid mixer in time for all this work!
Besides gifting me that brand-new mixer, my parents also gave me their cake pop maker. They bought it and used it once to try and make one of their favorite desserts, dorayaki, but it wasn't the right tool for the job. It sat in the kitchen collecting dust until I came home and realized I could put it to good use.
 |
| The Babycakes Cake Pop Maker! |
I then stuck these into the freezer for about 15 minutes while I made the coating. The quick chill helps the coating process. I used a recipe (again from the manual and listed below) for white chocolate glaze coating, making it in a tall glass so I could easily dip the cake pops into it.
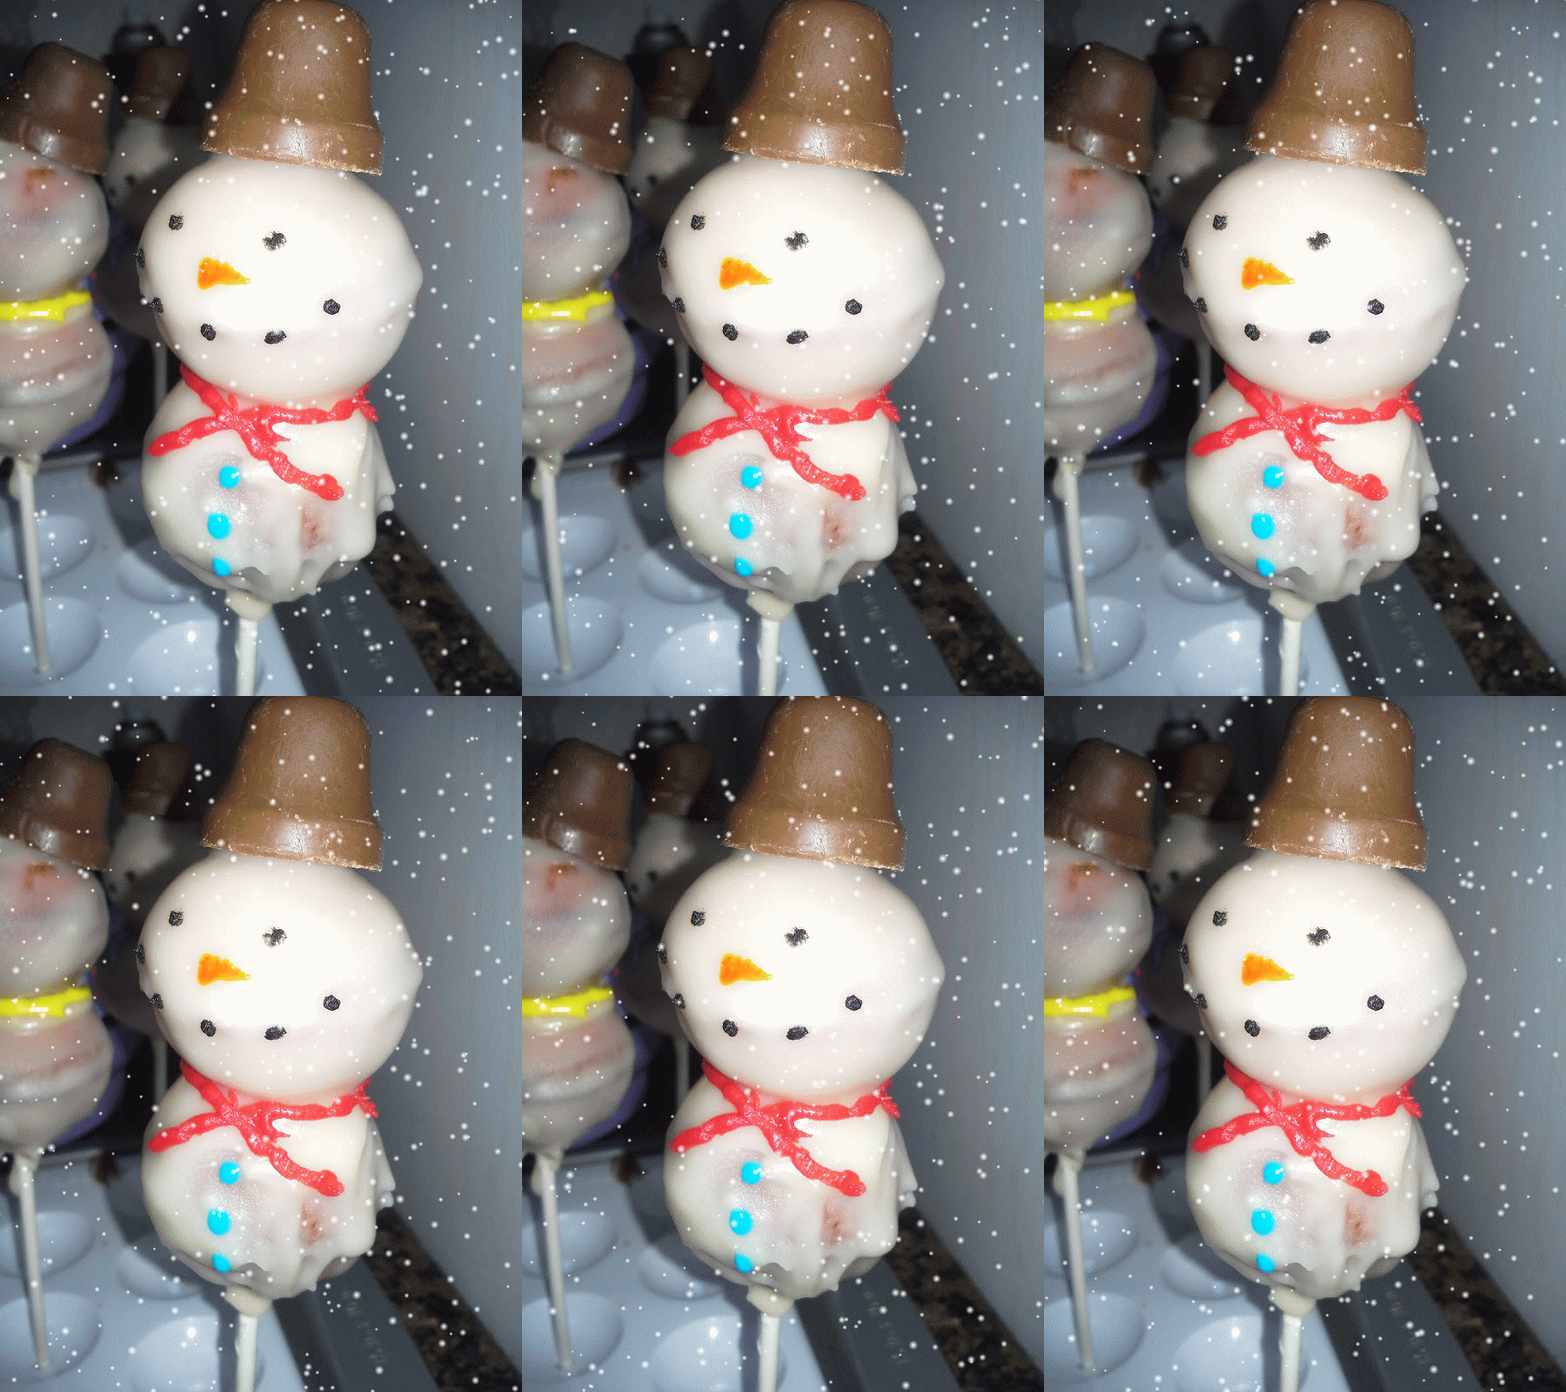
For its hat, I used Hershey's Chocolate Bells and stuck them on after coating so the hat would dry with the white chocolate. I then used frosting to add coal eyes and mouth, an orange carrot nose, and a brightly colored scarf and buttons.
First project of the week: success! (Except I have no idea how I'm getting these into work tomorrow....). Stay tuned for the rest of the projects this week! :)
Snowmen Cake Pops (makes a dozen and half)
Recipe from Babycakes
- 1/4 cup butter (unsalted, room temperature)
- 3/4 cup white sugar
- 1 egg
- 1 tsp vanilla extract
- 1 1/4 cup + 3 Tbsp of cake flour (the extra Tbsp because I used cake flour instead of regular)
- 1/4 tsp of salt
- 1 Tbsp cocoa
- 1/2 cup of buttermilk
- Red food coloring
- 1/2 tsp baking soda
- 1/2 tsp vinegar (white distilled)
- Beat butter until soft and fluffy. Add sugar and keep beating until combined (I used the Kitchenaid mixer on the lowest speed).
- Beat in egg and vanilla until combined.
- Mix flour, salt, and cocoa in separate bowl.
- Add red food coloring to buttermilk until desired shade is achieved (I used about 20 drops).
- Gradually blend in both flour and buttermilk mixture into butter mixture (still using mixer on lowest speed).
- React vinegar with the baking soda and add the fizzy result into the cake batter.
- Plug the cake pop maker in and let it heat up (green light indicates that it is ready).
- Fill each hole in machine with ~1 Tbsp of batter. Work quickly because the batter will start cooking the second it hits the machine. The machine will hold 12 at a time. Be careful not to overfill.
- Let it bake for 4 minutes.
- Remove cake pops and repeat until all batter has been used. You will have about 3 dozen cake pops.
- Stack two cake pops on one stick. This will give you about 18 sticks.
- Place on a baking sheet and place in freezer while you make the coating.
- Make the coating in a tall glass (see recipe below).
- Dip each cake pop stick into the glass until completely covered. Let the excess coating drip back and place stick in stick holder (the one that came with the machine or a foam block).
- While the coating is still wet, place a Hershey chocolate bell on the top of the cake pop for the hat.
- When the coating is dry, add eyes, nose, mouth, scarf, and buttons with frosting!
- Emjoy!
White Chocolate Glaze (makes enough to coat 3 dozen cake pops)
Recipe from Babycakes
- 1 cup of white chocolate chips
- 3 Tbsp heavy whipping cream
- 3 Tbsp butter (unsalted, room temperature)
- 1/2 cup powdered sugar
- 1/2 tsp vanilla extract
- In a tall glass, microwave the chocolate and the cream together until melted. Use 30 second intervals so it doesn't burn.
- Stir in butter. If it doesn't melt from residual heat, microwave for more 30 second intervals until melted.
- Add sugar and vanilla until combined.
- If it starts to harden during the cake pop coating process, return to microwave for 30 seconds to keep the coating fluid enough to coat.


No comments:
Post a Comment
Feedback? Questions? Comment!